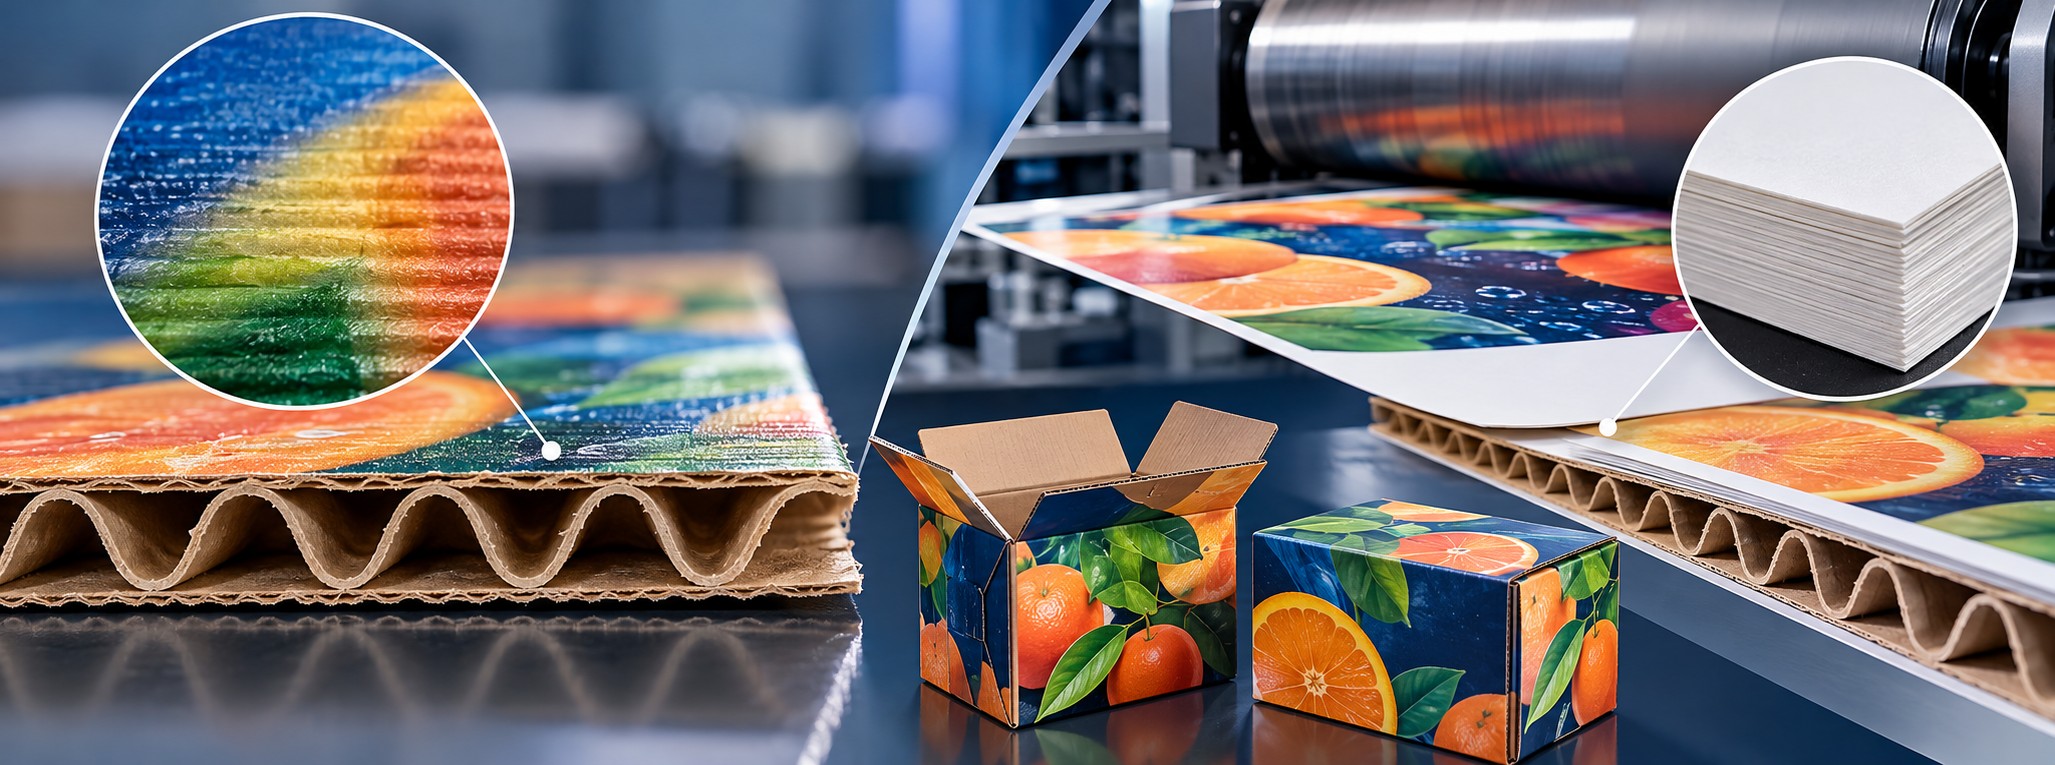
A corrugated box can leave the printing press with the right ink and color readings, yet still show unwanted bands across a solid background. On another job, a beautifully printed sheet can become visibly wavy only after it's bonded to corrugated board. These two defects can look similar. Their causes—and their solutions—may be completely different.
Corrugated board is not a perfectly flat sheet. Beneath its outer paper surface is a repeating pattern of flutes. That internal structure makes the box light and strong, but it also changes how the board responds to pressure, moisture, and glue. Before adjusting ink or recalibrating color, identify when the defect first appeared and which process created it.
There are two common production routes. Direct flexographic post-print puts ink directly onto finished corrugated board. Preprint and litho-lamination first print an image onto flat paper or light paperboard; the sheet is then bonded to the fluted structure. LEP is one way to print that facing sheet, offering short runs and variable designs without flexographic printing plates. Neither route is trouble-free: they simply move the main risks to different stages.
1. What does the operator actually see?
A typical complaint is a repeating light-and-dark pattern across a solid area. In some cases, the band spacing matches the spacing of the flutes. Under a different lighting angle, the same box may show a change in gloss rather than a clear change in color. In halftone images, details may look uneven even though a large solid patch appears acceptable.
The first inspection should be simple: look at an unprinted board, a freshly printed board, and—when applicable—a board after litho-lamination. Keep the samples from the same material batch. If the pattern exists on the unprinted board, investigate board manufacture and the outer liner. If it appears during direct printing, investigate the contact between the printing plate and the corrugated board. If it appears only after litho-lamination, start with adhesive application, moisture, pressure, and the printed facing sheet.
Two terms matter. Structural washboarding means that the board surface itself has a repeating raised-and-lowered profile. Print striping means that the ink or optical appearance varies in bands. They can occur together, but a stripe pattern doesn't prove the board surface is the primary cause.
2. Know the corrugated structure before changing press settings
A linerboard is the flat paper layer on the outside or inside of corrugated board. The fluting is the wavy paper medium bonded at the flute tips. A single-wall board commonly has two liners and one fluted medium. In a single-face construction, the fluting has only one liner; a printed facing sheet can later become the second outer face.
The distance between flute tips affects how much unsupported span exists beneath the printed liner. Closer flute spacing can help support the sheet more evenly, although liner grade, stiffness, glue application, and moisture remain important.
Flute type | Approximate flute height | Practical implication |
|---|---|---|
A flute | 4.8 mm | Relatively wide flute spacing can increase sensitivity to local support variations. |
B flute | 3.2 mm | Common packaging grade; outcome still depends on liner and press setup. |
C flute | 4.0 mm | Common in shipping boxes; check strength and face-liner properties. |
E flute | 1.6 mm | Often selected for compact retail packaging requiring finer graphics. |
F flute | 0.8 mm | Fine micro-flute that can provide a more closely supported face. |
These are approximate values reported in the 2023 folding-carton how-to guide, not purchasing specifications. Do not change flute type for visual quality without rechecking box compression and handling requirements.
3. Where does structural washboarding come from?
Washboarding can develop while the corrugated board is manufactured. The outer liner is bonded to the flute tips using adhesive. Local wetting, drying, and tension can pull or distort the sheet in a pattern related to the flutes. The result may already exist before printing begins.
Research on corrugated board has shown that excessive adhesive application can increase washboarding in some board constructions. Heavier or stiffer liners can resist that deformation better in some circumstances. These findings are useful, but not a license to reduce glue blindly: insufficient flute-tip bonding creates a different, potentially serious quality failure.
For the board supplier or corrugator team, useful checks include adhesive application uniformity, flute-tip bonding, moisture balance, liner basis weight, and actual surface profile. For the printing team, the practical lesson is to record the incoming-board condition before attributing the defect to the press.
4. Direct flexo: why more impression pressure can make things worse
In direct flexographic post-printing, the assembled board moves through the printing nip. The anilox delivers ink to the photopolymer plate, which then transfers it onto the board's outer liner. Because the board is compressible and supported periodically by the flutes, contact conditions may change along its surface.
Where the plate contacts the board differently, solids can print lighter or darker and halftone dots can deform differently. Increasing impression pressure can fill a light area, but it may also enlarge printed dots, close fine reverse details, smear edges, or crush the corrugated structure. The goal is consistent ink transfer at an acceptable load, not the highest possible impression.
A useful adjustment routine is to establish a stable baseline with ink viscosity and temperature under control, confirm anilox and doctor-blade condition, then evaluate impression in small, documented steps. Check a solid, a halftone, and fine detail after each change. If a stripe is still linked to flute spacing, review plate hardness and the mounting or cushioning system before adding more pressure.
The research by Holmvall and Uesaka helps explain why. The board's mechanical response, the printing plate, and the support beneath it influence pressure distribution. The visible corrugation profile alone does not necessarily explain the amount of print striping. In practice, a new plate or mounting combination may improve transfer more effectively than changing the ink recipe.
5. Do not overlook the outer liner
Even when two boards use the same flute type, they may print differently. A brown kraft liner, a white-top liner, and a coated white liner can differ in smoothness, porosity, surface strength, moisture, shade, and stiffness.
A rougher liner may have less effective contact with the plate. A different absorption behavior can change the apparent ink film and color. A change in paper shade can alter the measured result even without a meaningful change in deposited ink. If a problem appears after a board-supplier change, compare liner specifications and samples before rebuilding color settings.
For color control, optical density (OD) helps track solid-print consistency. Tone value increase (TVI) is useful for halftone behavior. CIEDE2000 color difference (ΔE00) can compare appearance to a reference, but one average ΔE00 cannot reveal a repeating stripe across a carton. Measure a sequence of positions across several bands; retain the layout and lighting conditions used for assessment.
6. The alternative: print on flat paper, then bond it to corrugated board
Another route is to print the graphic first on a flat paper or thin paperboard, then glue that printed sheet onto the corrugated construction. This is commonly called litho-lamination, although the facing sheet may be printed by offset or LEP.
The main advantage is clear: the color image is produced before the paper encounters the flute-supported structure. The printing press does not have to create the graphic through the corrugated board's variable support. The method is particularly useful when the job requires fine text, photographic artwork, controlled solids, detailed brand colors, or high-resolution retail packaging graphics.
LEP forms a polymeric ink image on a heated intermediate blanket and transfers it to a qualified flat substrate. It can be attractive for short and medium runs, multiple versions, localized packaging, and variable data. These are LEP workflow advantages—not proof that a LEP-printed sheet is always better than offset preprint, nor that its finished laminated carton will automatically be defect-free.
The high-quality print on relatively thin paperboard—roughly up to 250–270 micrometers in the example discussed—followed by cold adhesive attachment to corrugated board. This is an example from the guide, not a universal thickness limit for every press or laminator. Always qualify the actual paper grade and equipment.
7. The LEP-to-corrugated workflow: the checks that matter
A reliable production route starts with choosing a paper that prints well and can also be bonded from its reverse side. The printed face and the glue-contacting back are different interfaces. A primer used to qualify LEP image transfer on the front does not automatically solve a bonding problem on the back.
After printing and color inspection, apply a protective coating only if the application requires it and the coating is qualified for the downstream converting process. Next, feed the printed sheet and corrugated carrier into a litho-laminating machine. Depending on the plant, this may be an in-line, off-line, or sheet-to-sheet system.
The most important checks are consistent sheet feeding and registration, adhesive weight and coverage, moisture balance, contact pressure, and final flatness. If the printed sheet is glued onto single-face corrugated board, it becomes the outer face of that composite. If it is glued over an already assembled board, the construction differs and may include an additional facing layer. The two designs should not be treated as mechanically interchangeable.
Do not judge this process only by how the print looks before lamination. The approved item is the finished corrugated pack.
8. A good LEP print can still look bad after lamination
The 2023 how-to guide specifically warns that rubbing or scuffing may appear on the printed LEP ink layer during the corrugated finishing process, particularly where equipment imposes excessive contact pressure. Its practical recommendations are to reduce the relevant contact pressure as far as the process allows and consider a qualified, scuff-resistant overprint varnish (OPV).
These are separate actions. Lowering unnecessary mechanical stress addresses a potential cause. Adding varnish may improve surface durability, but it does not correct badly adjusted rollers, rubbing points, or a damaged transport path. Varnish also adds a new interface that must be checked for wetting, adhesion, cure, and final appearance.
Distinguish a scuff mark from ink adhesion failure. A scuff can be a surface abrasion while the ink remains well bonded. If ink lifts from the paper, examine the substrate–primer–ink interface. In either case, identify the affected rollers or guide surfaces and inspect the same location on consecutive sheets.
9. Adhesive, moisture, and pressure: the new risk in litho-lamination
Preprinting prevents pressure variation from the flutes during image creation. It does not prevent the facing paper from becoming wavy after it is glued down. Excess adhesive water, uneven coating, unbalanced moisture, incorrect grain direction, or unsuitable contact pressure can produce curl, warp, poor bonding, or a periodic surface profile after lamination.
Start with the adhesive supplier's qualified coat-weight and process window. Check actual coverage, not only the machine setpoint. Make sure the paper and carrier have been conditioned appropriately; materials stored at different relative humidity can behave differently when brought together. Verify nip-roll alignment and sheet transport rather than compensating for a local defect with a global pressure increase.
A weak bond is not always solved by adding more glue: the problem might be poor wetting, incompatible paper sizing, missing contact, or unsuitable drying conditions. A visibly wavy sheet is not always solved by reducing glue: the problem might be moisture imbalance or different dimensional response of the two papers. Change the variable only after the defect points to it.
10. Does preprinting eliminate washboarding?
It eliminates one important route to striped print: LEP applies the image on flat paper, not by pressing a flexographic plate directly onto flute-supported board. But the final corrugated package can still develop structural washboarding during lamination.
Consider a sheet with excellent color uniformity before bonding. After lamination, oblique lighting reveals repeating lighter and darker bands. If color readings made on the original print are stable and the finished sheet now shows a periodic surface profile, it is more productive to inspect the gluing and board construction than to change the LEP color profile.
Preprinting separates imaging from corrugated assembly. It does not remove the need for corrugated-board process control.
11. Direct print versus preprint: choose for the job, not the technology label
Production question | Direct flexographic post-print | LEP preprint + litho-lamination |
|---|---|---|
Where is the image printed? | On already assembled corrugated board. | On flat facing paper before bonding. |
Main print-related risk | Periodic contact-pressure differences and dot deformation. | Print scuffing or damage during downstream handling. |
Can final washboarding occur? | Yes, including on incoming board. | Yes, after bonding, despite a uniform original print. |
Detailed graphics and short runs | Depend on plate, board, job volume, and setup. | Can benefit from flat-surface imaging and digital versioning. |
Added converting operation | Usually no facing-sheet lamination for the graphic. | Adhesive lamination and registration are required. |
Main materials controls | Face-liner grade, flute support, ink, plate, mounting. | Facing paper, ink/coating durability, adhesive, moisture, nip. |
Final quality release | Printed board plus box performance. | Printed sheet plus finished laminated board and box performance. |
For a high-volume shipping box with straightforward graphics, direct flexo may be the most efficient route. For a promotional retail box with many artwork versions and fine photographic detail, LEP preprint and litho-lamination may be a strong option. Both need a real production trial on the specified board and packaging geometry.
12. Shop-floor troubleshooting: follow the evidence
What you see | Check first | Then inspect | Corrective direction |
|---|---|---|---|
Repeating bands visible before printing | Unprinted liner and board profile. | Flute pitch, board moisture, glue application. | Escalate to board/corrugator supplier with measured evidence. |
Bands appear only after direct flexo. | Solid and halftone test patches. | Impression, plate/mounting, anilox, and ink stability. | Adjust one press variable at a time; avoid over-impression. |
Solids improve, but halftones become heavier. | Dot shape and TVI. | Plate response and contact pressure. | Return to balanced impression and plate/support choice. |
Periodic shine differences with stable OD | Oblique-light inspection. | Surface profile and coating gloss. | Address board topography/finishing rather than color calibration. |
LEP sheet is clean; laminated sheet is wavy | Samples before and after bonding. | Glue weight, paper moisture, registration, nip pressure. | Correct the proven laminating variable. |
Scuffs appear on LEP print after converting | Mark position and contact points. | Guide rollers, nip, stack handling, OPV durability. | Reduce unnecessary rubbing; qualify protection if needed. |
Top sheet peels from corrugated carrier | Location of failure and adhesive coverage. | Back-side paper sizing, wetting, drying, pressure. | Correct the actual weak interface; verify bond strength. |
Finished box fails strength checks. | Thickness, flutes, crushing evidence. | Board specification, production loads, adhesive bond. | Restore structural performance before release. |
Do not use a color-profile change to cover a mechanical defect. A newly calibrated press may hide the symptom on one sample and produce new problems on the next batch.
13. A 15-minute first response to visible striping
Minute 0–3: preserve evidence. Collect an unprinted piece of board, the first good print, a defective print, and — if relevant — a pre-lamination and post-lamination sample. Mark machine direction and print side on every sample.
Minute 3–6: locate the first failed stage. Are the bands present on the unprinted board? Did they appear at the press? Or only at the laminator? Check whether spacing corresponds to flute pitch, but do not assume that matching pitch proves root cause.
Minute 6–10: compare a solid and a halftone. A pressure or plate problem may affect the two differently. In the litho-lamination route, compare the same printed artwork before and after the laminator; inspect under consistent lighting for abrasion, color change, and surface waves.
Minute 10–15: make one controlled adjustment. On direct flexo, start with press baseline and impression or plate-support checks. On the laminating machine, check adhesive application, nip condition, and moisture-related variables. Document the setting, sample, and result before making the next change.
This sequence is a practical first-response workflow, not a replacement for the plant's approved safety and machine-setting procedures.
14. Build a qualification trial that operators can repeat
When evaluating a new corrugated material, a different plate system, or a change from direct flexo to LEP litho-lamination, create a short, repeatable trial. Use the intended final board grade and production-speed range. Print a solid patch, a halftone patch, fine lines, small text, and a representative brand-color area.
Measure color consistency across the image rather than relying on a single reading. Record OD and color difference on the relevant patches and TVI when halftone control matters. Document process conditions and sample locations. In the preprint route, save sheets from before lamination and after lamination, because that is the fastest way to isolate a finishing defect from an imaging defect.
Also inspect the finished construction for flatness, bond integrity, flute damage, scuffing, folding quality, and carton performance. Depending on the product, structural testing can include an edge crush test (ECT), a flat crush test (FCT), or a box compression test (BCT). These measure different properties and must not be treated as substitutes for one another.
If a proposed fix improves appearance but damages board strength or glue integrity, it has not passed qualification.
15. Hand-off between printing, lamination, and packaging development
Most recurring defects survive because each team sees only one part of the process. The printer may release a good flat sheet, while the converter receives a sheet that scuffs at the nip. The corrugator may release structurally acceptable board, while the printer discovers a visible periodic density pattern on solid areas.
Use a shared job record covering the face-liner grade, flute construction, preprint paper, printing condition, primer where required, ink system, protective coating, lamination adhesive, and any proven process constraints. Retain approved samples from each stage and define who checks color, surface flatness, glue bond, and box strength.
When a customer reports a defect, request the finished package and information about its production stage, not only a photograph of the printed area. That evidence can prevent days of unrelated press and color adjustments.
16. Material usage, costs, and sustainability
Direct printing and litho-lamination can both be used in fiber-based packaging that is recoverable in suitable paper-recycling systems. Their environmental impact cannot be ranked from the printing technology alone.
A preprinted facing route may require an additional paper layer in some constructions, extra adhesive, and another converting operation. Direct print may avoid that operation, but it can also require a more expensive white liner or additional process controls to achieve the demanded appearance. LEP can reduce make-ready materials for short or frequently changing jobs, while long-run economics depend on the full production route.
Assess the finished package, not just the cost or weight of the printed sheet. Include material waste, setup losses, press speed, lamination rejects, box strength, logistics, and recyclability requirements. A visually attractive package that fails in transport is neither an effective product nor a meaningful sustainability improvement.
17. The practical takeaway: fix the stage that creates the defect
If bands exist on the board before printing, investigate board construction and incoming-material quality. If the bands appear only during direct flexo, investigate pressure, plate mechanics, ink transfer, and halftone reproduction. If a flat LEP print becomes wavy or scuffed after litho-lamination, investigate glue, moisture, nip contact, handling, and the printed surface's durability.
This diagnosis is more valuable than any universal setting for impression pressure or glue coat weight. The correct adjustment depends on the specific structure and the exact point where quality was lost.
The most effective production question is not "Which printing method is better?" It is "At which stage did the image stop meeting its requirements — and what changed there?"
Practical Source Notes
- HP Indigo Ltd. Folding Carton Packaging for Sheet-fed HP Indigo Digital Presses: How-to Guide, February 2023, document CA494-31510. Corrugated packaging description (printed p. 18), corrugated finishing and litho-lamination (printed pp. 92–95), lamination troubleshooting (printed p. 135). The guide describes thin preprinted facing sheets, in-line/off-line/sheet-to-sheet laminating, and the risk of ElectroInk scuffing during corrugated finishing. It does not supply one universal glue, pressure, or paper specification for every plant.
- Netz, E. (1998). Research on washboarding and print quality of corrugated board, Packaging Technology and Science. Relevant to the practical roles of flute-tip adhesive and face-liner properties; outcomes depend on the tested board designs.
- Holmvall, M., and Uesaka, T. (2007). Nip Mechanics of Flexo Post-printing on Corrugated Board, Journal of Composite Materials. Describes the significance of printing plate, liner, and contact mechanics in periodic print variation.
- Holmvall, M., and Uesaka, T. (2008). Research on corrugated-board print uniformity and halftone-dot deformation, Packaging Technology and Science. Relevant to the different responses of solid and screened areas.
- European Federation of Corrugated Board Manufacturers (FEFCO): testing recommendations for corrugated material and box performance; relevant national and international test methods should be selected for the actual specification.
How to use these sources: The document describes evidence-supported mechanisms and translates them into practical troubleshooting suggestions. The inspection workflow and adjustment sequence are recommendations for controlled plant trials, not fixed machine settings or a documented incident at a particular customer site.
Abbreviations and Technical Terms
Short form | Meaning |
|---|---|
LEP | Liquid Electrophotography |
OD | Optical Density |
TVI | Tone Value Increase |
ΔE00 | CIEDE2000 color-difference metric |
OPV | Overprint Varnish |
ECT | Edge Crush Test |
FCT | Flat Crush Test |
BCT | Box Compression Test |
FEFCO | European Federation of Corrugated Board Manufacturers |
Linerboard | Flat paper facing layer of corrugated board |
Fluting | Corrugated paper medium between facing layers |
Litho-lamination | Bonding a separately preprinted facing sheet to corrugated board |
Washboarding | Periodic surface waviness related to the underlying flutes |
Print striping | Repeating bands in ink density, tone, or gloss on the printed surface |